The Menu block allows you to automatically create menus listing all your website pages. In this tutorial, you will discover how you can create a main menu and submenus, allowing you to add more content while keeping your site organized.
In this example, we take a 7 pages website:
- Home
- Create a website
- 2.a Free website
- 2.b Professional website
- 2.c Online store
- Gallery
- Contact
The page "Create a website" has 3 subpages "Free website", "Profesional website" et "Online store".
The main menu, in order to keep it clear and simple, will only contain the 1, 2, 3 et 4 : "Home", "Create a website", "Gallery" and "Contact".
The "Create a website" page will contain a submenu which will allow visitors to go to the subpages : "Free website", "Profesional website" and "Online store".
Pages and main Menu
The first step is to create 7 pages.
Please note that Starter package website can only create 5 pages. Upgrade your website to be able to create an unlimited number of pages.
Then, rename and change the page hierarchy:
Select the Menu by clicking on it. Then, on the left hand side of the screen, in the orange zone, you will be able to change the page order and their hierarchy by drag and dropping them
Then, click on the Menu again, then on Manage pages. You can switch from page to page by pressing the Tab key.
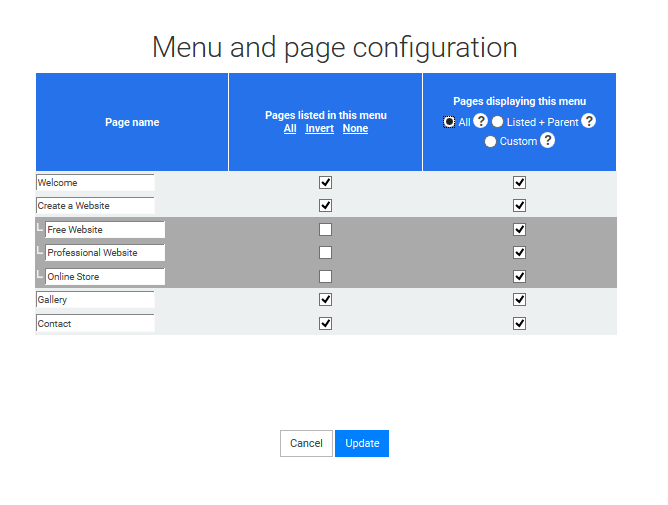
- Check the boxes in the column "Page listed..." to select all the pages except "Free website", "Profesional website" and "Online store"
- Select, in the column "Page listing this menu", "All the pages" to display the menu on all the pages

Main menu configuration
Submenu
- Then, go to the page "Free website"
- and create a second Menu by drag and dropping a Menu blog:
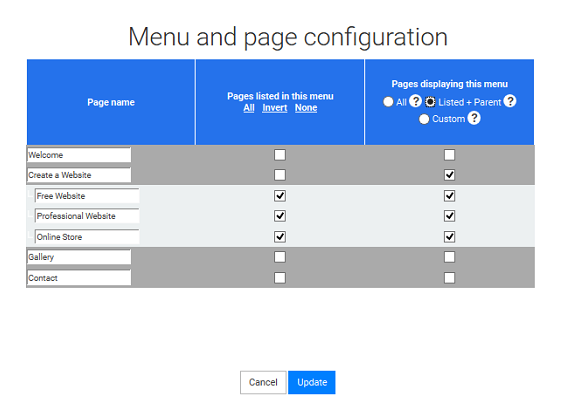
- Check the boxes "Free website", "Profesional website" and "Online store" in the "Pages listed" column
- Select "Listed + parent" in the column "Page dislaying this menu"

Sub-menu configuration
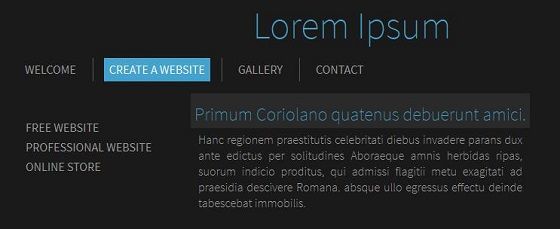
The main menu now lists all your first level pages and a submenu shows your subpages. This menu is displayed on all the subpages and on the page "Create a website". You can also make the main menu unclickable, if needed. To do so, just check the proper case in the Design panel.
On the page "Free website" both menus are displayed


